Prev Tutorial: Using OpenCV Java with Eclipse
Next Tutorial: Introduction into Android Development
| Original author | Mimmo Cosenza |
| Compatibility | OpenCV >= 3.0 |
- Warning
- This tutorial can contain obsolete information.
As of OpenCV 2.4.4, OpenCV supports desktop Java development using nearly the same interface as for Android development.
Clojure is a contemporary LISP dialect hosted by the Java Virtual Machine and it offers a complete interoperability with the underlying JVM. This means that we should even be able to use the Clojure REPL (Read Eval Print Loop) as and interactive programmable interface to the underlying OpenCV engine.
What we'll do in this tutorial
This tutorial will help you in setting up a basic Clojure environment for interactively learning OpenCV within the fully programmable CLojure REPL.
Tutorial source code
You can find a runnable source code of the sample in the samples/java/clojure/simple-sample folder of the OpenCV repository. After having installed OpenCV and Clojure as explained in the tutorial, issue the following command to run the sample from the command line.
Preamble
For detailed instruction on installing OpenCV with desktop Java support refer to the correspondingtutorial".
If you are in hurry, here is a minimum quick start guide to install OpenCV on Mac OS X:
@note
I'm assuming you already installed <a href="https://developer.apple.com/xcode/" target="_blank" >xcode</a>,
<a href="http://www.oracle.com/technetwork/java/javase/downloads/index.html" target="_blank" >jdk</a> and
<a href="http://www.cmake.org/cmake/resources/software.html" target="_blank" >Cmake</a>.
@code{.bash}
cd ~/
mkdir opt
git clone https://github.com/opencv/opencv.git
cd opencv
git checkout 2.4
mkdir build
cd build
cmake -DBUILD_SHARED_LIBS=OFF ..
...
...
make -j8
# optional
# make install
@endcode
@section autotoc_md884 Install Leiningen
Once you installed OpenCV with desktop java support the only other requirement is to install
<a href="https://github.com/technomancy/leiningen" target="_blank" >Leiningeng</a> which allows you to manage the entire life
cycle of your CLJ projects.
The available <a href="https://github.com/technomancy/leiningen#installation" target="_blank" >installation guide</a> is very
easy to be followed:
-# <a href="https://raw.github.com/technomancy/leiningen/stable/bin/lein" target="_blank" >Download the script</a>
-# Place it on your $PATH (cf./bin is a good choice if it is on your path.)
-# Set the script to be executable. (i.e. chmod 755/bin/lein).
If you work on Windows, follow <a href="https://github.com/technomancy/leiningen#windows" target="_blank" >this instruction</a>
You now have both the OpenCV library and a fully installed basic Clojure environment. What is now
needed is to configure the Clojure environment to interact with the OpenCV library.
@section autotoc_md885 Install the localrepo Leiningen plugin
The set of commands (tasks in Leiningen parlance) natively supported by Leiningen can be very easily
extended by various plugins. One of them is the
<a href="https://github.com/kumarshantanu/lein-localrepo" target="_blank" >lein-localrepo</a> plugin which allows to install any
jar lib as an artifact in the local maven repository of your machine (typically in the
/.m2/repository directory of your username).
We're going to use this lein plugin to add to the local maven repository the opencv components
needed by Java and Clojure to use the opencv lib.
Generally speaking, if you want to use a plugin on project base only, it can be added directly to a
CLJ project created by lein.
Instead, when you want a plugin to be available to any CLJ project in your username space, you can
add it to the profiles.clj in the/.lein/ directory.
The lein-localrepo plugin will be useful to me in other CLJ projects where I need to call native
libs wrapped by a Java interface. So I decide to make it available to any CLJ project:
@code{.bash}
mkdir ~/.lein
@endcode
Create a file named profiles.clj in the/.lein directory and copy into it the following content:
@code{.clojure}
{:user {:plugins [[lein-localrepo "0.5.2"]]}}
@endcode
Here we're saying that the version release "0.5.2" of the lein-localrepo plugin will be available to
the :user profile for any CLJ project created by lein.
You do not need to do anything else to install the plugin because it will be automatically
downloaded from a remote repository the very first time you issue any lein task.
@section autotoc_md886 Install the java specific libs as local repository
If you followed the standard documentation for installing OpenCV on your computer, you should find
the following two libs under the directory where you built OpenCV:
- the build/bin/opencv-247.jar java lib
- the build/lib/libopencv_java247.dylib native lib (or .so in you built OpenCV a GNU/Linux OS)
They are the only opencv libs needed by the JVM to interact with OpenCV.
@subsection autotoc_md887 Take apart the needed opencv libs
Create a new directory to store in the above two libs. Start by copying into it the opencv-247.jar
lib.
@code{.bash}
cd ~/opt
mkdir clj-opencv
cd clj-opencv
cp ~/opt/opencv/build/bin/opencv-247.jar .
@endcode
First lib done.
Now, to be able to add the libopencv_java247.dylib shared native lib to the local maven repository,
we first need to package it as a jar file.
The native lib has to be copied into a directories layout which mimics the names of your operating
system and architecture. I'm using a Mac OS X with a X86 64 bit architecture. So my layout will be
the following:
@code{.bash}
mkdir -p native/macosx/x86_64
@endcode
Copy into the x86_64 directory the libopencv_java247.dylib lib.
@code{.bash}
cp ~/opt/opencv/build/lib/libopencv_java247.dylib native/macosx/x86_64/
@endcode
If you're running OpenCV from a different OS/Architecture pair, here is a summary of the mapping you
can choose from.
@code{.bash}
OS
Mac OS X -> macosx
Windows -> windows
Linux -> linux
SunOS -> solaris
Architectures
amd64 -> x86_64
x86_64 -> x86_64
x86 -> x86
i386 -> x86
arm -> arm
sparc -> sparc
@endcode
@subsection autotoc_md888 Package the native lib as a jar
Next you need to package the native lib in a jar file by using the jar command to create a new jar
file from a directory.
@code{.bash}
jar -cMf opencv-native-247.jar native
@endcode
Note that ehe M option instructs the jar command to not create a MANIFEST file for the artifact.
Your directories layout should look like the following:
@code{.bash}
tree
.
|__ native
| |__ macosx
| |__ x86_64
| |__ libopencv_java247.dylib
|
|__ opencv-247.jar
|__ opencv-native-247.jar
3 directories, 3 files
@endcode
@subsection autotoc_md889 Locally install the jars
We are now ready to add the two jars as artifacts to the local maven repository with the help of the
lein-localrepo plugin.
@code{.bash}
lein localrepo install opencv-247.jar opencv/opencv 2.4.7
@endcode
Here the localrepo install task creates the 2.4.7. release of the opencv/opencv maven artifact from
the opencv-247.jar lib and then installs it into the local maven repository. The opencv/opencv
artifact will then be available to any maven compliant project (Leiningen is internally based on
maven).
Do the same thing with the native lib previously wrapped in a new jar file.
@code{.bash}
lein localrepo install opencv-native-247.jar opencv/opencv-native 2.4.7
@endcode
Note that the groupId, opencv, of the two artifacts is the same. We are now ready to create a new
CLJ project to start interacting with OpenCV.
@subsection autotoc_md890 Create a project
Create a new CLJ project by using the lein new task from the terminal.
@code{.bash}
# cd in the directory where you work with your development projects (e.g. ~/devel)
lein new simple-sample
Generating a project called simple-sample based on the 'default' template.
To see other templates (app, lein plugin, etc), try `lein help new`.
@endcode
The above task creates the following simple-sample directories layout:
@code{.bash}
tree simple-sample/
simple-sample/
|__ LICENSE
|__ README.md
|__ doc
| |__ intro.md
|
|__ project.clj
|__ resources
|__ src
| |__ simple_sample
| |__ core.clj
|__ test
|__ simple_sample
|__ core_test.clj
6 directories, 6 files
@endcode
We need to add the two opencv artifacts as dependencies of the newly created project. Open the
project.clj and modify its dependencies section as follows:
@code{.bash}
(defproject simple-sample "0.1.0-SNAPSHOT"
description "FIXME: write description"
url "http://example.com/FIXME"
license {:name "Eclipse Public License"
url "http://www.eclipse.org/legal/epl-v10.html"}
dependencies [[org.clojure/clojure "1.5.1"]
[opencv/opencv "2.4.7"] ; added line
[opencv/opencv-native "2.4.7"]]) ;added line
@endcode
Note that The Clojure Programming Language is a jar artifact too. This is why Clojure is called an
hosted language.
To verify that everything went right issue the lein deps task. The very first time you run a lein
task it will take sometime to download all the required dependencies before executing the task
itself.
@code{.bash}
cd simple-sample
lein deps
...
@endcode
The deps task reads and merges from the project.clj and the/.lein/profiles.clj files all the
dependencies of the simple-sample project and verifies if they have already been cached in the local
maven repository. If the task returns without messages about not being able to retrieve the two new
artifacts your installation is correct, otherwise go back and double check that you did everything
right.
@subsection autotoc_md891 REPLing with OpenCV
Now cd in the simple-sample directory and issue the following lein task:
@code{.bash}
cd simple-sample
lein repl
...
...
nREPL server started on port 50907 on host 127.0.0.1
REPL-y 0.3.0
Clojure 1.5.1
Docs: (doc function-name-here)
(find-doc "part-of-name-here")
Source: (source function-name-here)
Javadoc: (javadoc java-object-or-class-here)
Exit: Control+D or (exit) or (quit)
Results: Stored in vars *1, *2, *3, an exception in *e
user=>
@endcode
You can immediately interact with the REPL by issuing any CLJ expression to be evaluated.
@code{.clojure}
user=> (+ 41 1)
42
user=> (println "Hello, OpenCV!")
Hello, OpenCV!
nil
user=> (defn foo [] (str "bar"))
#'user/foo
user=> (foo)
"bar"
@endcode
When ran from the home directory of a lein based project, even if the lein repl task automatically
loads all the project dependencies, you still need to load the opencv native library to be able to
interact with the OpenCV.
@code{.clojure}
user=> (clojure.lang.RT/loadLibrary org.opencv.core.Core/NATIVE_LIBRARY_NAME)
nil
@endcode
Then you can start interacting with OpenCV by just referencing the fully qualified names of its
classes.
@note
<a href="https://docs.opencv.org/4.x/javadoc/index.html" target="_blank" >Here</a> you can find the full OpenCV Java API.
@code{.clojure}
user=> (org.opencv.core.Point. 0 0)
#<Point {0.0, 0.0}>
@endcode
Here we created a two dimensions opencv Point instance. Even if all the java packages included
within the java interface to OpenCV are immediately available from the CLJ REPL, it's very annoying
to prefix the Point. instance constructors with the fully qualified package name.
Fortunately CLJ offer a very easy way to overcome this annoyance by directly importing the Point
class.
@code{.clojure}
user=> (import 'org.opencv.core.Point)
org.opencv.core.Point
user=> (def p1 (Point. 0 0))
#'user/p1
user=> p1
#<Point {0.0, 0.0}>
user=> (def p2 (Point. 100 100))
#'user/p2
@endcode
We can even inspect the class of an instance and verify if the value of a symbol is an instance of a
Point java class.
@code{.clojure}
user=> (class p1)
org.opencv.core.Point
user=> (instance? org.opencv.core.Point p1)
true
@endcode
If we now want to use the opencv Rect class to create a rectangle, we again have to fully qualify
its constructor even if it leaves in the same org.opencv.core package of the Point class.
@code{.clojure}
user=> (org.opencv.core.Rect. p1 p2)
#<Rect {0, 0, 100x100}>
@endcode
Again, the CLJ importing facilities is very handy and let you to map more symbols in one shot.
@code{.clojure}
user=> (import '[org.opencv.core Point Rect Size])
org.opencv.core.Size
user=> (def r1 (Rect. p1 p2))
#'user/r1
user=> r1
#<Rect {0, 0, 100x100}>
user=> (class r1)
org.opencv.core.Rect
user=> (instance? org.opencv.core.Rect r1)
true
user=> (Size. 100 100)
#<Size 100x100>
user=> (def sq-100 (Size. 100 100))
#'user/sq-100
user=> (class sq-100)
org.opencv.core.Size
user=> (instance? org.opencv.core.Size sq-100)
true
@endcode
Obviously you can call methods on instances as well.
@code{.clojure}
user=> (.area r1)
10000.0
user=> (.area sq-100)
10000.0
@endcode
Or modify the value of a member field.
@code{.clojure}
user=> (set! (.x p1) 10)
10
user=> p1
#<Point {10.0, 0.0}>
user=> (set! (.width sq-100) 10)
10
user=> (set! (.height sq-100) 10)
10
user=> (.area sq-100)
100.0
@endcode
If you find yourself not remembering a OpenCV class behavior, the REPL gives you the opportunity to
easily search the corresponding javadoc documentation:
@code{.clojure}
user=> (javadoc Rect)
"http://www.google.com/search?btnI=I%27m%20Feeling%20Lucky&q=allinurl:org/opencv/core/Rect.html"
@endcode
@subsection autotoc_md892 Mimic the OpenCV Java Tutorial Sample in the REPL
Let's now try to port to Clojure the @ref tutorial_java_dev_intro "OpenCV Java tutorial sample".
Instead of writing it in a source file we're going to evaluate it at the REPL.
Following is the original Java source code of the cited sample.
@code{.java}
import org.opencv.core.Mat;
import org.opencv.core.CvType;
import org.opencv.core.Scalar;
class SimpleSample {
static{ System.loadLibrary("opencv_java244"); }
public static void main(String[] args) {
Mat m = new Mat(5, 10, CvType.CV_8UC1, new Scalar(0));
System.out.println("OpenCV Mat: " + m);
Mat mr1 = m.row(1);
mr1.setTo(new Scalar(1));
Mat mc5 = m.col(5);
mc5.setTo(new Scalar(5));
System.out.println("OpenCV Mat data:
" + m.dump());
}
}
@endcode
@subsection autotoc_md893 Add injections to the project
Before start coding, we'd like to eliminate the boring need of interactively loading the native
opencv lib any time we start a new REPL to interact with it.
First, stop the REPL by evaluating the (exit) expression at the REPL prompt.
@code{.clojure}
user=> (exit)
Bye for now!
@endcode
Then open your project.clj file and edit it as follows:
@code{.clojure}
(defproject simple-sample "0.1.0-SNAPSHOT"
...
injections [(clojure.lang.RT/loadLibrary org.opencv.core.Core/NATIVE_LIBRARY_NAME)])
@endcode
Here we're saying to load the opencv native lib anytime we run the REPL in such a way that we have
not anymore to remember to manually do it.
Rerun the lein repl task
@code{.bash}
lein repl
nREPL server started on port 51645 on host 127.0.0.1
REPL-y 0.3.0
Clojure 1.5.1
Docs: (doc function-name-here)
(find-doc "part-of-name-here") Source: (source function-name-here) Javadoc: (javadoc java-object-or-class-here) Exit: Control+D or (exit) or (quit) Results: Stored in vars *1, *2, *3, an exception in *e
user=> Import the interested OpenCV java interfaces.
We're going to mimic almost verbatim the original OpenCV java tutorial to:
- create a 5x10 matrix with all its elements initialized to 0
- change the value of every element of the second row to 1
- change the value of every element of the 6th column to 5
- print the content of the obtained matrix
If you are accustomed to a functional language all those abused and mutating nouns are going to irritate your preference for verbs. Even if the CLJ interop syntax is very handy and complete, there is still an impedance mismatch between any OOP language and any FP language (bein Scala a mixed paradigms programming language).
To exit the REPL type (exit), ctr-D or (quit) at the REPL prompt.
Interactively load and blur an image
In the next sample you will learn how to interactively load and blur and image from the REPL by using the following OpenCV methods:
- the imread static method from the Highgui class to read an image from a file
- the imwrite static method from the Highgui class to write an image to a file
- the GaussianBlur static method from the Imgproc class to apply to blur the original image
We're also going to use the Mat class which is returned from the imread method and accepted as the main argument to both the GaussianBlur and the imwrite methods.
Add an image to the project
First we want to add an image file to a newly create directory for storing static resources of the project.

Read the image
Now launch the REPL as usual and start by importing all the OpenCV classes we're going to use:
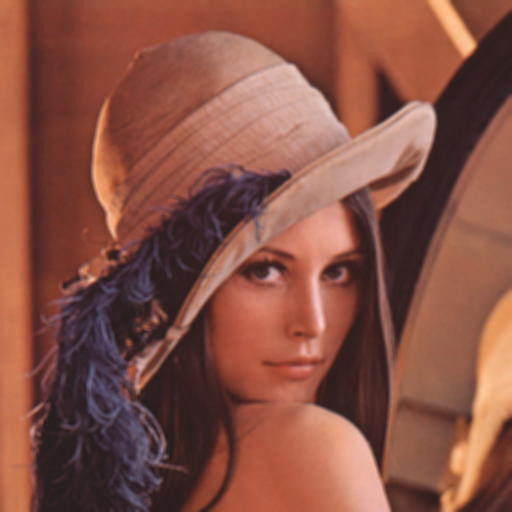
Now read the image from the resources/images/lena.png file.
As you see, by simply evaluating the lena symbol we know that lena.png is a 512x512 matrix of CV_8UC3 elements type. Let's create a new Mat instance of the same dimensions and elements type.
Now apply a GaussianBlur filter using lena as the source matrix and blurred as the destination matrix.
As a last step just save the blurred matrix in a new image file.
Following is the new blurred image of Lena.
Next Steps
This tutorial only introduces the very basic environment set up to be able to interact with OpenCV in a CLJ REPL.
I recommend any Clojure newbie to read the Clojure Java Interop chapter to get all you need to know to interoperate with any plain java lib that has not been wrapped in Clojure to make it usable in a more idiomatic and functional way within Clojure.
The OpenCV Java API does not wrap the highgui module functionalities depending on Qt (e.g. namedWindow and imshow. If you want to create windows and show images into them while interacting with OpenCV from the REPL, at the moment you're left at your own. You could use Java Swing to fill the gap.
License
Copyright © 2013 Giacomo (Mimmo) Cosenza aka Magomimmo
Distributed under the BSD 3-clause License.
